

How To Create a SharePoint Site: A Step by Step Guide

Creating a SharePoint site fixes three specific problems: file confusion, version disputes, and excessive internal email. The company gets one repository, flexible access control, and built-in communication tools. This guide explains the exact steps to build a SharePoint site from scratch and start using it right away.


 SharePoint does not need weekly maintenance. With the right structure and permissions, it runs on its own. The site owner needs to add content and make sure users do not create chaos.
What is Microsoft SharePoint
SharePoint works in two roles. It serves as a corporate portal where teams publish news and store documents. It also replaces file servers and network folders while adding more advanced tools. Companies use SharePoint in several practical ways.- For department documents, teams store files in a shared library instead of keeping them on local computers or sending them by email. Everyone works with the current version.
- For company news, teams publish updates on the main page instead of sending mass emails. Employees see the news when they open the portal.
- For projects, teams create a separate workspace for each project. The workspace contains documents, tasks, and the team calendar.
- For regulations and instructions, teams build a knowledge base. Employees use it to find the current version of a policy, application form, or manual.
Why Use SharePoint: 7 Key Features
Before explaining how to build a good SharePoint site, you need to understand what the platform can do. Below are the core capabilities in practical terms.- Co-authoring documents. Multiple people can open the same Word or Excel file in a browser and edit it at the same time. The system shows who changes what. It keeps version history, so teams can restore an earlier version when needed.
- Centralized news. A team publishes a post once on the main page, and employees see it in their feed. This reduces internal email and eliminates long chains of attached files.
- Page building without code. Employees can assemble pages from ready-made blocks such as text, images, links, documents, and news. They do not need HTML or developer support for standard pages.
- Flexible permissions. Administrators can give all employees read access and limit editing rights to a small group. They can apply permissions at the site, folder, or file level.
- Routine automation. SharePoint works with Power Automate. A team can set a rule such as: when someone uploads a contract to the “Incoming” folder, the system sends it to a manager for approval and creates a reminder. This does not require custom code.
- Content search. Search checks not only file names but also the text inside documents. A query like “budget 2025” returns documents that contain those words even when the file name does not mention them.
- Metadata instead of folders. Teams can assign tags such as “client,” “project,” and “status” to documents. They can then filter the library by those tags and find related files faster, even when the files sit in different folders.
Three Site Types: What to Choose Right Now
Before you click Create, choose the right site type. A wrong choice at this stage creates extra work later and can force the team to migrate content by hand.- Team suits work inside a department or project team. It creates a closed collaboration space. In most cases, SharePoint also creates a Microsoft 365 group, along with a shared calendar, shared mailbox, and shared Teams workspace. Only team members get access.
- Communication suits a company-wide portal, news publishing, or shared forms and resources for all employees. It presents content rather than supports day-to-day collaboration. The layout gives more room to graphics, large headings, and news sections. Most employees get read access, while authors get editing rights.
- Hub suits organizations that already use several sites, or plan to launch them soon, and want to connect them through shared navigation. A hub does not replace a standard site. You enable hub functionality on one existing site and then connect other sites to it. This gives users a shared header menu and search across connected sites.
How to Create a SharePoint Site: Step-by-Step Instructions
The following is pure technology. The steps are performed sequentially. Knowing how to set up a SharePoint site correctly from the start prevents future problems.Define Goals and Audience
Before working with the computer, answer two questions:- Why is this site being created? (Storing department documents / publishing news / managing a project)
- Who will be the main users? (5 people from a team / 200 people from a sales department / all 1000 company employees)
Design the Architecture
Plan on paper where things will go. This saves hours of rework in six months.- Navigation. Determine which sections should be in the menu. Optimally, no more than 5–7 items. For example: "Home," "Documents," "News," "Contacts," "Tasks."
- Libraries. Decide what folders or tags are needed. Nesting deeper than 3 levels is not recommended. Instead of folders like "2025/Clients/Romashka LLC/Contracts," it's better to use a "Client" column and filter by it.
- Permissions. Define roles. Who will be the administrator (can change structure), who will be a member (can add and edit), and who will be a reader (view only).
Choose Site Components
Before starting to how create SharePoint site, determine its elements:- Document libraries. Storage locations for files. For example: "Contracts," "Regulations," "Marketing Materials."
- Lists. Storage for structured information. For example: a task list, event calendar, knowledge base with links.
- Pages. Types of content for publication. For example: a welcome page, department page, news posts.
Sign in to Microsoft 365
Sign in with your work account using one of the addresses:
Open SharePoint
After signing in, click the "app launcher" icon (the squares) in the top-left corner and select SharePoint.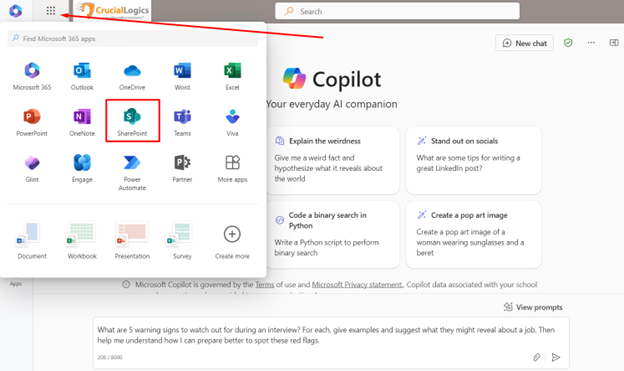
Start Site Creation
On the SharePoint start page, click the "Create site" button.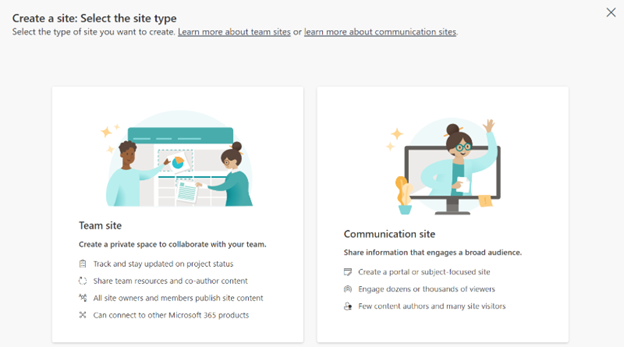
Choose the Site Type
The creation wizard shows two options: Team site and Communication site. The choice is based on the decision made in step 5.1.Fill in the Parameters
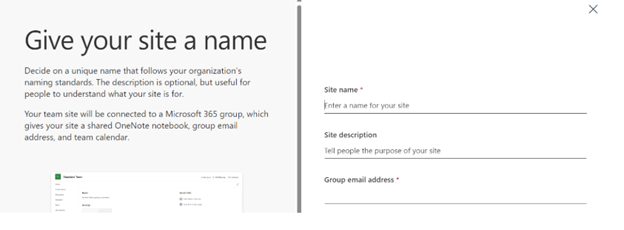
Fill in the following fields:- Site name. Should be clear to users. For example, "HR Portal," not "Site 153."
- Site description. A brief explanation of the site's purpose. This field is indexed by search, so it's worth including keywords.
- Privacy settings.
- Public — the site is visible to all employees in the organization.
- Private — the site is visible only to those granted access.
Add a Document Library
After site creation, add the basic functionality:- Click the "New" button (usually in the left menu or center of the screen).
- Select "Document library."
- Select "Blank library."
- Enter a name, for example, "Department Documents."
- Click "Create."
- The library opens. Click "Upload" and add the first files.
Customize the Home Page
Return to the home page ("Home" button in the left menu) and make it useful at first glance:- Click "Edit" (the pencil icon in the top right corner).
- Click the circles with plus signs to add blocks:
- "Text" — add a welcome message and brief instructions.
- "Quick links" — add links to frequently used documents or external systems.
- "News" — create the first announcement post about the site launch.
- "Document library" — display a list of recent documents on the home page.
- Drag the blocks with the mouse to change their order.
- Click "Publish" (or "Republish") to make the changes visible to everyone.
Conclusion
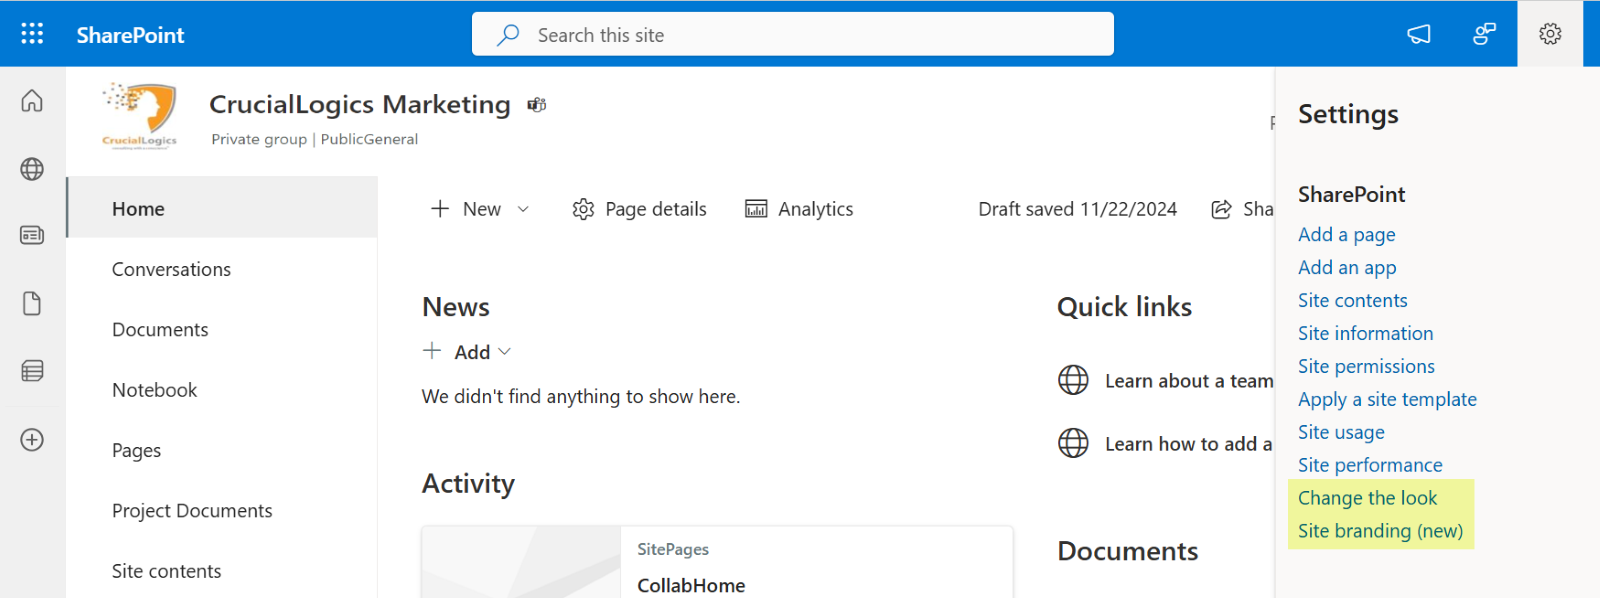
After you create the site, you need to take three actions within the next three days. These final steps make sure the site starts working as a real tool instead of sitting unused.- Add people. Click the settings gear icon → "Site permissions" → "Add members." Assign rights (read or edit) and send the site link.
- Create folder structure or tags. If storing a large number of files is planned, set up columns with metadata immediately. For example, for contracts, create columns like "Counterparty," "Amount," "Status."
- Publish a welcome news post. Create a post explaining why the site was created, what to find there, and how to use it. Attach screenshots or a short video. Encourage employees to ask questions in the comments.
 SharePoint does not need weekly maintenance. With the right structure and permissions, it runs on its own. The site owner needs to add content and make sure users do not create chaos.
Next post: AI in Utilities


